Note : Please note that any changes made to the original source code will be lost after updating to the latest versions.
Email Campaigns
- Email Campaigns
- Users List
- Templates
1. Email Campaigns
Email campaigns are custom emails designed to engage customers effectively. The campaign data is stored in a structured table format with the following fields:
The Email Campaigns table includes the following columns:
Sl. No : Serial number of the campaign.
-
Title : The title of the created campaign.
-
Status: Indicates whether the campaign is scheduled for a specific time or sent immediately.
-
Scheduled: Specifies if the campaign is scheduled (Yes/No).
-
Users: Displays the number of users the campaign email was sent to.
-
Actions: Contains a delete option to delete the campaign.
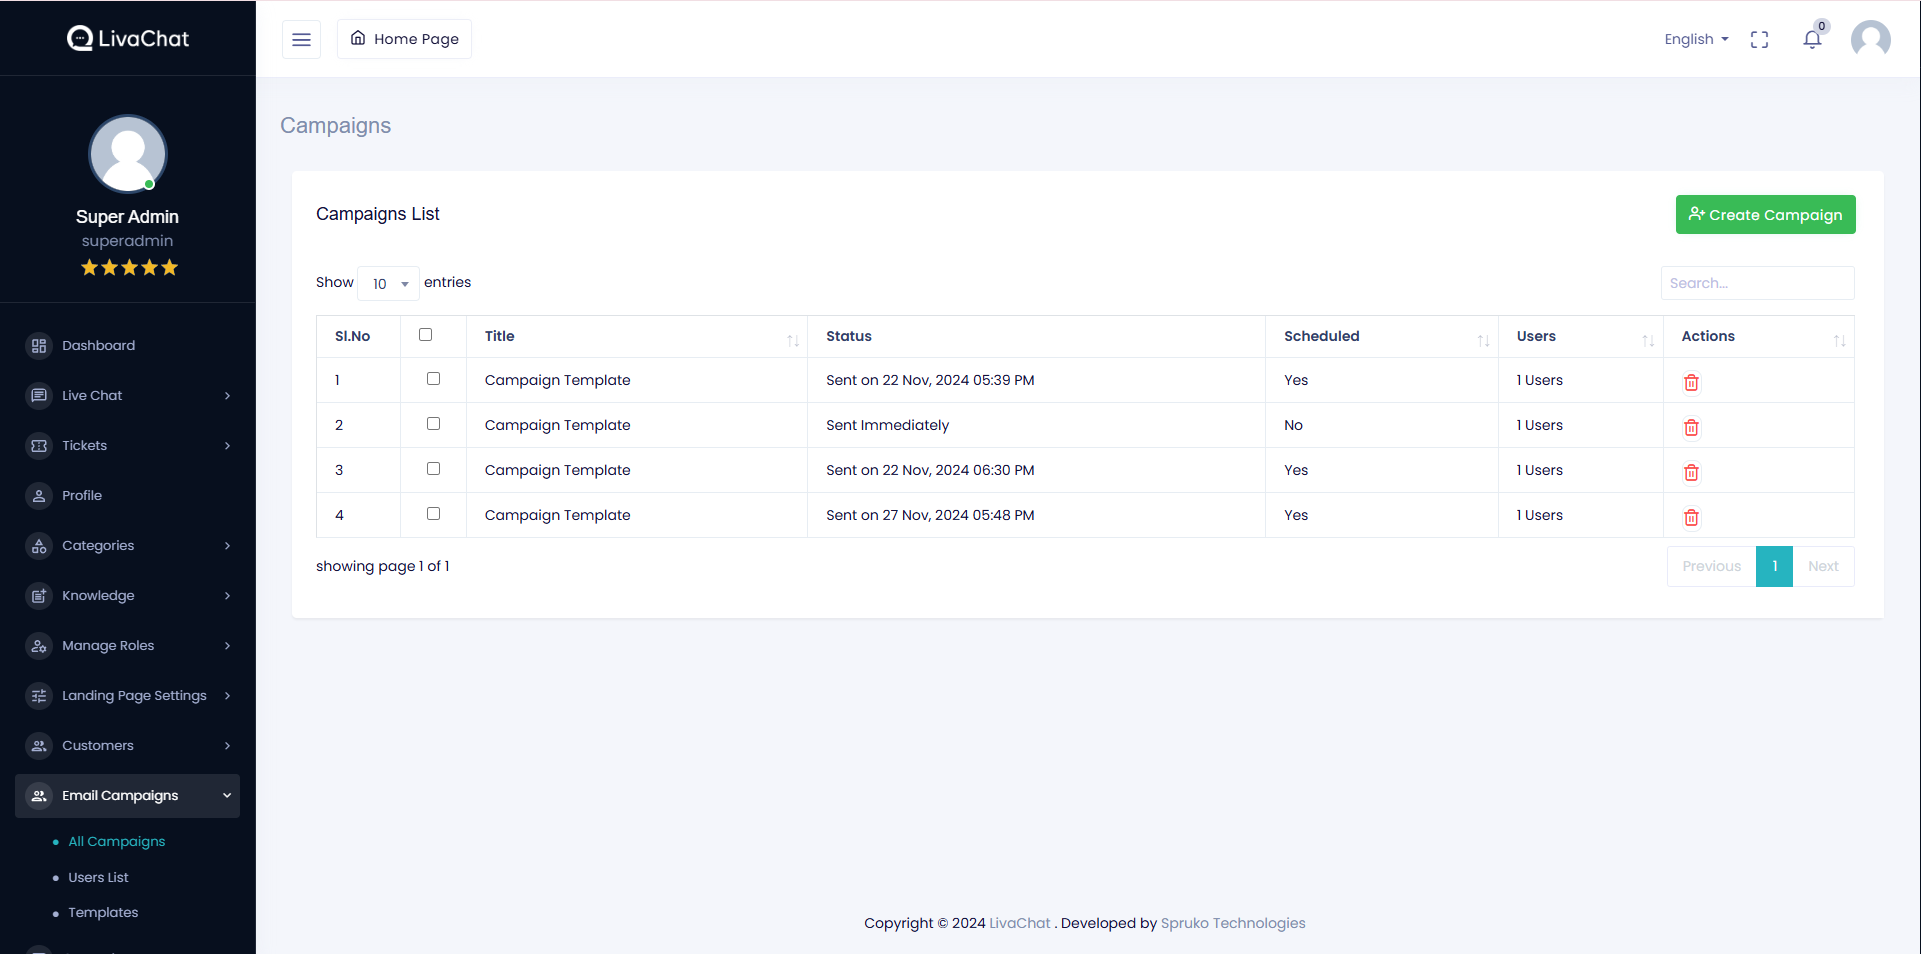
Campaign Creation:
Above the email campaigns table, a Create Email Campaign button is available. Clicking this button redirects you to the Create Campaign page, which provides the following fields to configure your campaign:
-
Choose Template : A dropdown to select from previously created email templates.
-
Choose Type (Required) : A dropdown to select the target audience for the campaign. Options include:
- All Users
- Batch
- Live Chat Users
- Newsletter Users
Based on the selected type, an additional dropdown appears to specify the relevant users.
-
Mail Subject (Required): The subject line of the email.
-
Email Body: The content of the email.
-
Schedule Campaign:
- A date and time input field to schedule the campaign.
- If left empty, the campaign will be sent immediately.
- If a date and time are specified, the campaign email will be sent at the chosen time.
-
Unsubscribe Link: Must be included in the email body.
When clicked, users can opt-out of receiving future campaigns.
2. Users List
The Users List page displays a comprehensive list of all application customers, allowing for effective user management. The list is organized in a table format with the following fields:
-
Sl. No : Serial number of the user.
-
Email : The customer's email address.
-
Source : Indicates how the customer was added, such as through Live Chat, Newsletter, Created by Admin, or Imported Batch.
-
Batch Name : Displays the batch name if the user was imported using the "Import Users" feature; otherwise, it will be null.
-
Created At : The date the user's details were added.
-
Subscription Status : An on/off switch that allows the admin to manage the user's subscription. If a user unsubscribes, this status is automatically turned off.
-
Actions : Contains a delete button to remove a user from the list.
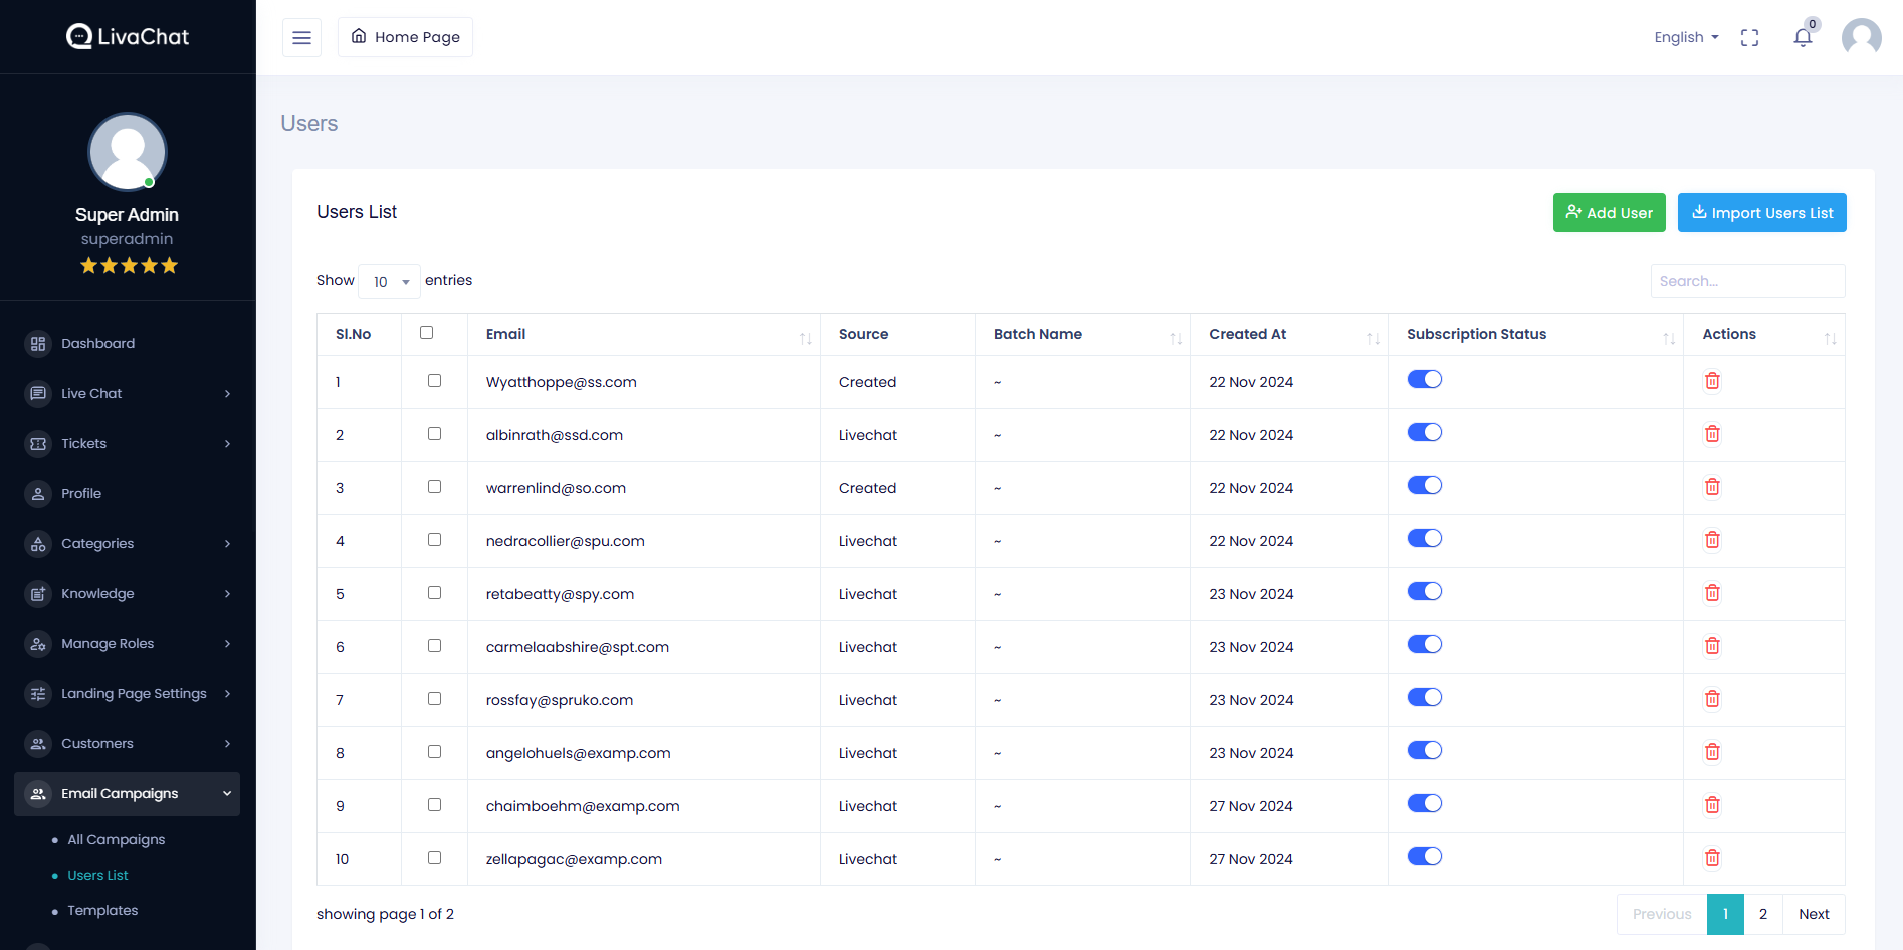
User Creation
-
Above the Users List table, two buttons are provided to manage user creation:
-
Add User :
Clicking this button opens a modal popup with two fields
-
Email*: The email address of the user (required).
-
Batch Name: The name of the batch the user belongs to.
-
Import Users :
Clicking this button redirects you to the User Import page.
On this page, you will find
-
Batch Name : Field to specify the batch name for the imported users. If left blank, the current date is used as the batch name.
-
File Upload : Field to upload a file containing the list of users.
-
A sample file is available below the file upload field. You can download this sample, fill in the user email addresses, and upload the file.
-
Upon upload, all users in the file will be imported into the application under the specified or default batch name.
-
These features provide flexibility for managing and adding users efficiently.
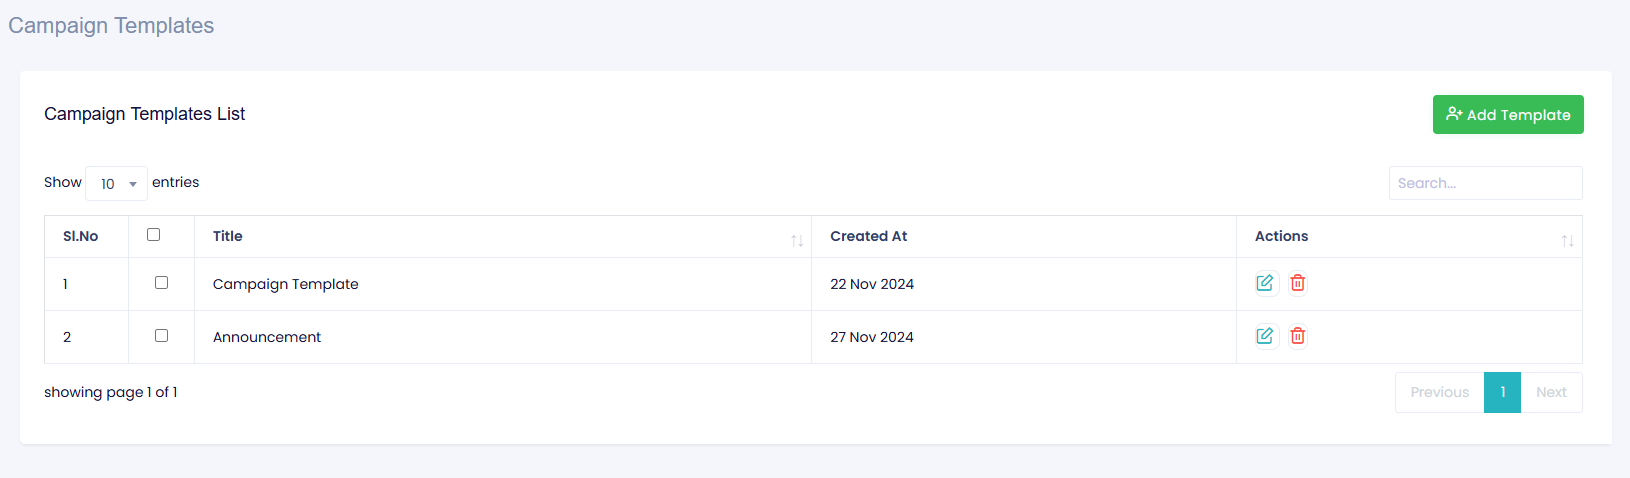
3. Templates
-
The Templates section, part of the Email Campaigns, displays all email templates in a tabular format. The table includes the following columns:
-
Sl. No : Serial number of the template.
-
Title : The title assigned to the template.
-
Created At : The date when the template was created.
-
Actions : Contains Edit and Delete buttons for managing templates.
Creating Templates
-
The Templates section, part of the Email Campaigns, provides a convenient way to manage and create predefined email messages for campaigns.
-
Above the templates table, there is an Add Template button.
-
Adding A Template :
Clicking the Add Template button redirects you to the Add Template page, where you will find the following fields:
-
Template Title : A reference name for the template, displayed in the templates table and during campaign creation.
-
Email Subject : The subject line for the email campaigns using this template.
-
Email Body : The content of the email. An unsubscribe link must be included, allowing users to opt out of receiving future emails.
-
Benefits of Using Templates :
Templates serve as predefined messages, enabling you to create and send email campaigns quickly and efficiently. By selecting an existing template while creating a campaign, you can significantly reduce the time spent drafting emails. Additionally, templates can be styled and customized to match the type and purpose of each campaign.
Copyright © 2024 LivaChat. Designed with by Spruko All rights reserved.